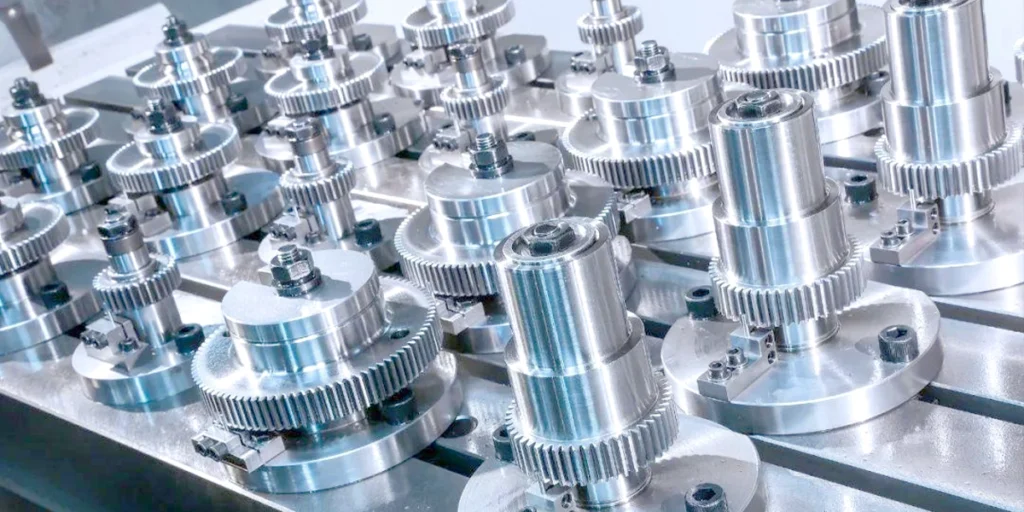
What is the working principle of CNC milling?
The essence of CNC milling is to remove material and form the target geometry by driving the relative movement between the cutting tool and the workpiece through a digital control system. Unlike traditional manual machining, CNC milling relies on program instructions to achieve high repeatability and high precision.
Control system (G-code)
The “brain” of CNC milling is the control system, and its core language is G-code.
The role of G-code
Convert CAD models into machine tool executable instructions, for example:
- Toolpath
- Spindle Speed
- Feed Rate
- Processing sequence
Key steps in the processing flow
- CAD modeling (3D model)
- CAM programming (generating toolpaths)
- Post-processing (outputs G-code)
- Upload to machine tool for execution
Actual impact
- Inappropriate G-code → Increased machining time and accelerated tool wear
- Optimized toolpaths → can reduce machining time by 20%–40%
In actual production, programming ability directly determines cost and quality. This is why established manufacturers employ dedicated CAM engineers rather than simply relying on automatically generated paths.
Spindle and feed system
If the G-code is the “brain,” then the spindle and feed system are the “actuators.”
1. Spindle System
Controlling the rotation of the cutting tool directly affects:
- Cutting efficiency
- Surface quality
- Material adaptability
Key parameters include:
- Rotational speed (RPM)
- Torque
- Stability (Vibration Control)
2. Feed System
Controlling the movement of the tool or workpiece in the X/Y/Z axes determines the accuracy of the machining path, including:
- Servo motor
- Lead screw/linear guide
- Control feedback system
3. The Importance of Synergy Between the Two
Machining quality = Overall result of spindle + feed + control system:
- Excessive rotation speed + feed mismatch → tool burn/burrs
- Unstable feed → dimensional errors
- Poor vibration control → poor surface roughness

What is the CNC milling process (from a manufacturer’s perspective)?
Many customers believe that CNC milling is simply a matter of “uploading drawings → receiving parts.” However, in actual production, every step directly impacts cost, delivery time, and yield.
A mature manufacturer does not simply perform processing, but rather systematically controls the entire process.
Design → Programming → Manufacturing → Inspection
1. Design for Manufacturing Phase
After the customer provides the CAD files, the first step is not to immediately begin manufacturing, but to conduct a DFM (Manufacturability Analysis):
- Are there any difficult-to-machine structures (deep cavities, thin walls, acute angles)?
- Are the tolerances reasonable (are there any unnecessary high-precision requirements)?
- Is the material suitable for CNC machining?
Many projects can reduce costs at this stage. For example, adjusting certain ±0.01 mm to ±0.02 mm can directly reduce processing difficulty and price.
In real-world projects, experienced engineering teams typically offer optimization suggestions before providing a quote, rather than simply executing the drawings.
2. Programming Phase (CAM Programming)
This step determines the processing efficiency.
- Toolpath planning (separation of roughing and finishing)
- Tool selection (carbide/coated tools)
- Cutting parameter settings (speed, feed)
Differences in different programming strategies may lead to:
- Processing time variation: 20%–50%
- Tool life variation: significantly impacts cost
- Surface quality stability
Mature manufacturers typically base their decisions on:
- Material type
- Component complexity
- Batch size
Use differentiated programming instead of using fixed templates.
3. Machining Execution Stage
Once the process is carried out on a machine tool, the key is not just “whether it can be done”, but whether it is stable and repeatable.
The core control points include:
- Clamping stability (preventing deformation)
- Processing sequence (to reduce stress release)
- Tool wear monitoring
- Temperature and vibration control
For complex parts, especially those requiring multi-faceted machining or high-precision structures, multiple clamping operations or even 5-axis linkage are often required to complete the process.
4. Quality Inspection Phase
The completion of processing does not mean the end of the process.
Standard procedures typically include:
- First Article Inspection
- In-process inspection
- Final Inspection
Detection methods may include:
- Coordinate Measuring Machine (CMM)
- Calipers / Micrometer
- Surface roughness tester
For industries with high requirements (such as medical and aviation), complete quality reports and traceability documents are also required.
Key control points
Throughout the process, there are several key moments that directly determine the final outcome:
1. Technical assessment before quoting a price
Many issues are already determined before the process even begins:
- Was a suitable process selected?
- Is there design redundancy?
- Can the processes be combined?
Inexperienced suppliers often skip this step and go straight to quoting prices and processing, leading to a sudden outbreak of problems later on.
2. Process route design
A good toolpath can bring:
- Fewer tool changes
- Shorter processing time
- More stable size control
Conversely, the following will occur:
- Over-processing
- Vibrating knife
- Inconsistent surface
3. Clamping and positioning strategy
This is an underestimated but extremely crucial point; improper clamping can lead to:
- Deformation
- Size offset
- Repeat positioning error
In complex parts, the clamping scheme is often more important than the machine tool itself.
4. Process Quality Control
Reliable manufacturers monitor the process during manufacturing, rather than just inspecting it at the end.
- Tool life management
- Mid-process inspection of critical dimensions
- Batch consistency control
How do CNC milling machines process metal blanks?
The process of transforming a raw piece of metal into a final precision part is not simply a matter of “direct cutting.” The way the blank is processed directly affects accuracy, the risk of deformation, and processing costs.
Many processing problems (instable dimensions, surface defects, deformation) actually stem from improper handling of this step.
Raw material preparation
The sources of unfinished structures vary from project to project, but common sources include:
- Sawing of sheets/bars
- Forgings
- Castings
- Pre-processed semi-finished products
Choosing which one to use is not just a matter of materials, but a balance between cost and performance.
1. Dimensional allowance (machining allowance)
The blank size will not equal the finished product size; machining allowance must be reserved.
- Too small → Unable to fully manufacture to the target size
- Too large → Increases working hours and tool wear
Common control logic:
- Rough machining area: Allow for a larger margin
- Finishing area: More precise allowance
In mass production, the stability of margin control directly affects the yield rate.
2. Material state and internal stress
This is an issue that many customers tend to overlook.
Metallic materials will experience internal stress under the following conditions:
- Forging/Casting
- Heat treatment
- Cold working
If processed directly, the following may occur:
- Deformation after processing
- Size drift
- Uneven surface
Response methods include:
- Preprocessing (such as aging treatment)
- Staged machining (stress relief after rough machining, followed by finish machining)
3. Surface treatment (before processing)
Some blanks require pretreatment before entering the machine tool:
- Remove oxide scale
- Deburring
- Clean oil stains
These may seem basic, but they have an impact:
- Clamping stability
- Tool life
- Surface quality
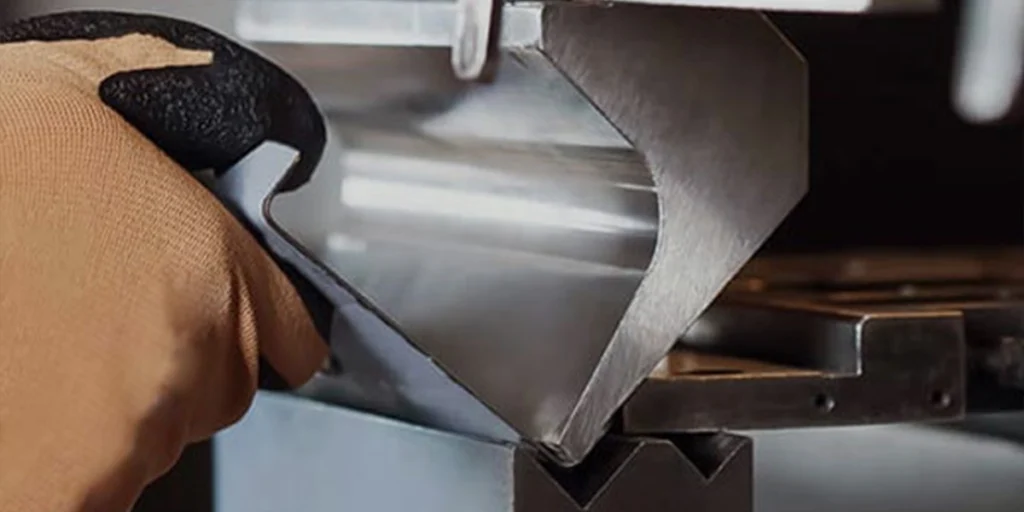
Clamping method
After the blank is prepared, the next step is clamping. This step is often underestimated, but it determines whether the machining is “controllable”.
1. Common clamping methods
Different solutions are selected depending on the structure of the parts:
- Vise clamping: Suitable for regular block-shaped parts
- Pressure plate fixing: Suitable for large or irregular parts
- Specialized fixtures: commonly used in mass production to improve consistency.
- Vacuum adsorption: for thin-walled or easily deformable parts
- Five-axis multi-face clamping: for complex structural parts
2. The core objective of clamping
Clamping is not just about “fixing” the object in place, but about simultaneously satisfying the following conditions:
- Stability (prevents vibration)
- Precision (ensuring positioning benchmark)
- Repeatable (batch consistency)
If the clamping strategy is inappropriate, common problems include:
- Loosening during processing
- Repeated clamping leads to the accumulation of errors.
- Deformation of thin-walled parts
3. Multiple clamping and error control
For complex parts, it is difficult to complete all machining in a single clamping. This necessitates multiple clamping operations:
- Each repositioning may introduce errors.
- Improper reference selection → Loss of control over the dimensional chain
Optimization methods include:
- Use a unified reference plane
- Reduce the number of setups (e.g., 5-axis machining)
- Design auxiliary positioning structure
4. Key differences in actual production
In actual manufacturing, the differences between different suppliers often manifest themselves here:
- Is a clamping scheme designed for each part?
- Is the clamping force optimized for thin-walled/high-precision structures?
- Does it possess the capability to design complex fixtures?
These factors won’t be reflected in the quote, but they will be reflected in the final quality.
What are the main steps in CNC milling?
From a manufacturing perspective, a part is not typically produced in a single, precise cut. The standard process involves a phased approach: first, material is removed; then, dimensions are approximated; and finally, the surface is optimized.
This is not just a matter of efficiency, but also about controlling deformation, stress, and dimensional stability.
Roughing
The goal of roughing is straightforward: to remove excess material as efficiently as possible.
- Use large-diameter cutting tools and high feed rates
- Large depth of cut, but precision is not a primary concern.
- Leave a uniform allowance for subsequent finishing processes.
The focus at this stage is not on “precision,” but on “stability” and “speed.”
Common practices include:
- Layered cutting (to avoid overload)
- Adaptive toolpaths are used (to reduce tool impact).
- Control cutting heat (to prevent material deformation)
If the roughing strategy is flawed, the following issues may arise:
- Uneven local allowance
- Stress release leads to deformation
- Difficulty in controlling dimensions during finishing
In complex parts, rough machining may even need to be completed in two steps to gradually release the internal stress of the material.
Finishing
The finishing stage is the core that truly determines the quality of parts.
The goal is:
- Achieve final dimensional tolerances
- Improve surface quality
- Ensure geometric accuracy (flatness, perpendicularity, etc.)
The strategy for this stage is completely different from that for rough processing:
- Small depth of cut, small feed
- Use high-precision cutting tools
- Stricter path control
Key control points include:
- Tool wear compensation (otherwise the dimensions will drift)
- Control of thermal deformation (especially noticeable during long-term processing)
- Vibration suppression (affects surface roughness)
For high-precision parts (such as ±0.02 mm level).
The process often involves: semi-finishing → finishing → smoothing.
Such a multi-level strategy.
Surface treatment
After a part is machined, it is not necessarily ready for use. In many cases, further surface treatment is required to meet functional or aesthetic requirements.
Common processing methods include:
- Deburring
- Polishing
- Bead Blasting
- Anodizing
- Powder Coating
Different processing methods have different effects:
- Improved corrosion resistance
- Improve appearance consistency
- Increase surface hardness
- Reduce friction
It is important to note that:
- Surface treatments can alter dimensions (e.g., anodizing increases thickness).
- Tolerances must be allowed in advance for precision parts.
How to optimize the processing flow (cost + accuracy)
In real-world projects, cost and precision are not entirely contradictory. In most cases, high processing costs are not due to high requirements, but rather to an inefficient process.
The core of optimization is not “lowering standards”, but rather: using a more efficient path to achieve the same or even better results.
Reduce clamping times
Each clamping operation brings two things:
- Time cost (repositioning, correction)
- Accuracy risk (cumulative baseline error)
This problem is amplified in complex parts.
1. Why does the number of clamping operations affect cost?
- One more clamping step → One more tool setting and alignment step
- Increased operation time
- Machine tool occupancy time increased
For mass production, these costs are linearly cumulative.
2. Why does the number of clamping operations affect accuracy?
Even with high-precision equipment, it is impossible to completely avoid:
- Repeat positioning error
- Reference switching error
- Human error
This is especially evident in the following situations:
- Multi-faceted machined parts
- Parts with high tolerance requirements
- Asymmetric structure
3. Optimization Methods
Common optimization strategies in actual production include:
- Use 5-axis machining to reduce the number of times the surface needs to be flipped.
- Design a unified reference surface
- Use specialized fixtures to improve repeatability.
- Integrate multiple processes into a single clamping operation
A reasonable optimization can often:
- Reduce processing time by 10%–30%
- Simultaneously improve dimensional stability
Optimal toolpath
Toolpath is one of the core variables affecting efficiency. Much cost waste actually occurs in the “invisible path”.
1. Common Inefficient Path Problems
- Excessive idle travel (ineffective tool movement)
- Uneven cutting load (local overcut)
- Inappropriate cutting method (increases impact)
These issues won’t directly report errors, but they will lead to:
- Increased processing time
- Increased tool wear
- Unstable surface quality
2. Efficient Path Strategy
Mature CAM strategies typically employ the following:
- Adaptive Clearing: Maintains a constant cutting load and reduces tool wear.
- Equal height/equal spacing finishing path: Improves surface uniformity
- Reduce blade lifting and idle strokes: Improve overall efficiency
3. Tool matching and path matching
Path optimization must be matched with tool selection:
- Large cutting tools → Used for efficient material removal
- Small knives → Used for detailed structural details
- Ball end mill → Used for finishing curved surfaces
If the match is invalid, the following will occur:
- Over-processing
- Abnormal tool wear
- Processing time does not need to be increased.